
Today I’m expanding the term ‘one move’ to mean more of a collection of steps that are used as one. This will become clearer when I explain, today’s movement is a rhythm turn. A movement that is exactly as it states, you create a rhythm as you turn. The turn is broken into many little tiny step, much like courus turning or pivot turns in character.
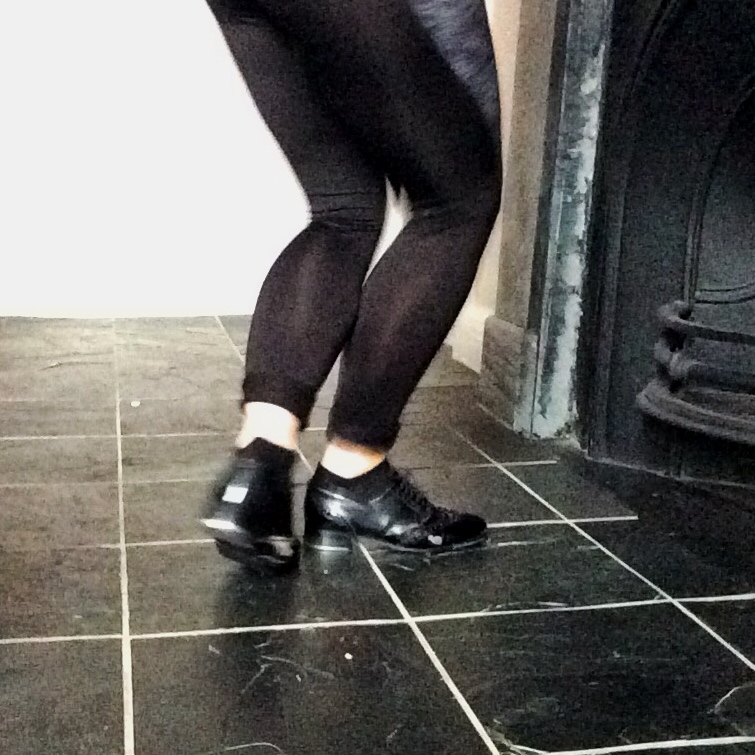
I only came across these a few months ago at a conference I went to, and while on the surface they can be really simple, it is also quite tricky to get your feet around to the right place at the right time. For this post I’m going to be talking about a basic rhythm turn, which for me is Shuffle step, Heel, Heel, Ball, Ball. The first two movements, so the shuffle step and the heel are done with the same foot. The timing for this becomes, 1&2,&,3,&,4, but to begin with can be slower if needed.
To make this movement turn the shuffle step goes across the supporting leg, crossing over infront where the heel of the foot is dropped as you swivel to begin uncrossing the legs. The rest of the movements are completed whilst you spin to face the front and almost come naturally from that initial impulse. Just remember to get the next foot ready in order to continue with the action, if not you may come unstuck.
One of the keys to having a good rhythm turn is having bent knees. This allows the weight to be constantly changed from ball to heel and from left to right. Keeping the weight lows helps with this as you’re closer to the ground and are more balanced, in order to shift the weight a lot quicker and smoother. Another tip to help with the smoothness is to leave gaps between your feet. If there’s floor space, you’re less likely to drop the flat of your foot onto the other or become tangled up. More space means more room to think about what’s coming next, and less chance of the movement stopping.
Getting the rhythm right is also important for the rhythm turn, I get students to start with the rhythm immediately, but use a slower tempo. It can also be converted into a simple rhythm of, 1,2,3,4,5,6,7. Often though, this can be confusing due to the pause or missing 8 count that students may expect to have. I also find that having more than one rhythm to think of can become confusing for some students and so is best to simply concentrate on one at different speeds.
Here’s an example of a few songs I’ve used with students to help with these turns (with increasing tempo);
- Everlasting Light – The Black Keys
- Drumming Song – Florence and the Machine
- You Never Can Tell – Chuck Berry
Each of the above songs still have a nice clear 1&2&3&4 rhythm but have a slightly different speed and sound to them. Sometimes it’s nice to vary the genre the students are tapping to, as you may find the students click with one genre more than another.
Another part of the rhythm to work on, is that initial crossing motion. If that is too small it can be really hard to eek out a good rhythm turn. Work on developing that crossed position by stretching it a little further than you think it should be. This will really help you fly around the turn, which then becomes another problem, whereby you may find it’s quite hard to fit in all the beats as you sail around to the front. Have control during the turn and remember to engage your core muscle. In doing so you’ll be able to slow down the turn a little and feel a little less manic.
So,
Shuffle Step, Heel, Heel, Ball, Ball. They’re all the moves that turn you. I teach that the shuffle step crosses to the first side, meaning a quarter of the turn has been done. I then use the Heel, Heel, for the next quarter, one for catching the upper body up with the legs and the next to turn everything to the back. Then finally the Ball, Ball, turns to face the front, making this section the biggest, turning-wise. Everyone may have a different method to completing their rhythm turn, this is simply mine.
I hope this helps you master your rhythm turns!
