

I’ve been a fan of Zwift for a while. I may not use it as much as I might want to, but having a way of training inside in a fun way to me is great. It takes me back to having a wii fit and running through their virtual world most mornings, whilst jogging on the spot (or just moving the wii-motes with your hands). For those who don’t know, Zwift is a program that allows you to connect an indoor trainer and cycle through their 3d worlds, while collecting xp and ‘ride ons’ from fellow riders also in the virtual world. You’re able to see the pace you’re working at, message friends as you ride, go on virtual group rides with people around the world, and connect heart rate monitors for more data onscreen.

But this post is about running not cycling, so where do running fit in? Earlier this year Zwift launch a new feature that changes the game completely, you can now run in the Zwift universe. There are a few caveats with this though as you cannot simply start running and expect the program to know everything. While access to Zwift running is free (not sure if you can sign up for a free account straight away, but I’m still able to run on my Zwift account with no distance limits having cancelled my subscription over two years ago), being able to access it will come at a cost. The best way to get connected to Zwift is through a FootPod, there are many on the market, Zwift themselves produce one that fully loaded and ready to connect. However, I like to keep most of my tech in the same family, there’s just something about everything seamlessly working together that I enjoy, I opted for a slightly harder to connect set-up of the Garmin Footpod that I will talk you through below.
I bought a Garmin Footpod a little after realising that the apps you can download for your Garmin watch to measure treadmill output just aren’t that good, in my opinion. It seemed like a great option works through ANT+ to connect to my Garmin Watch in order to give it the information about my running it wouldn’t otherwise get reliably, ie cadence and distance. As it is able to calculate distance it also works well for running through tunnels or in low GPS areas. I quickly set this up using the add new function under settings/sensors and accessories, once connected it will connect whenever the footpod is awake and your about to start an activity. Oftentimes the footpod will connect even quicker than GPS will acquire signal. Connecting it to the computer was now the next hurdle.

As the Footpod works using ANT+ I had no way of connecting that to my computer, as that’s only capable of bluetooth connectivity. Which is where another piece of tech comes in, the ANT+ receiver, acquired from amazon for under £10 (on sale – usually around £15). This allows my laptop to receive the signal of the Footpod in order to know how well I’m running.
SIDENOTE: Now you’re probably thinking at this point, surely my watch could just connect straight to Zwift using it’s bluetooth connection. A connection it can definitely have as the watch is designed to work with the connectIQ app. That would definitely be ideal, however, it is not reality. There is currently no way to get Zwift to register your watch as a suitable device to tell it pace, even when connected to a Footpod that can work that out when you’re on a treadmill. There is something you can do with your Garmin watch though, which I’ll mention at the end of this post.
Back to the ANT+ receiver, I chose to place this in the extension cable that came with the little USB stick (when I say little, it’s tiny), and lay this next to treadmill, and stick the USB cable into my computer’s port. I opened Zwift selected run and then tried to search for a cadence sensor it remained empty, even when waking up the Footpod by walking around with it. The picture below shows why this might have been happening. Long story short I discovered the ANT+ receiver wasn’t in all the way to the extension cord (rookie error). Once connected the ANT+ receiver icon was highlighted in white, just like the bluetooth one. At this point I closed the app and restarted, just to be sure, and opened the cadence menu, as before only this time the Footpod instantly came up.

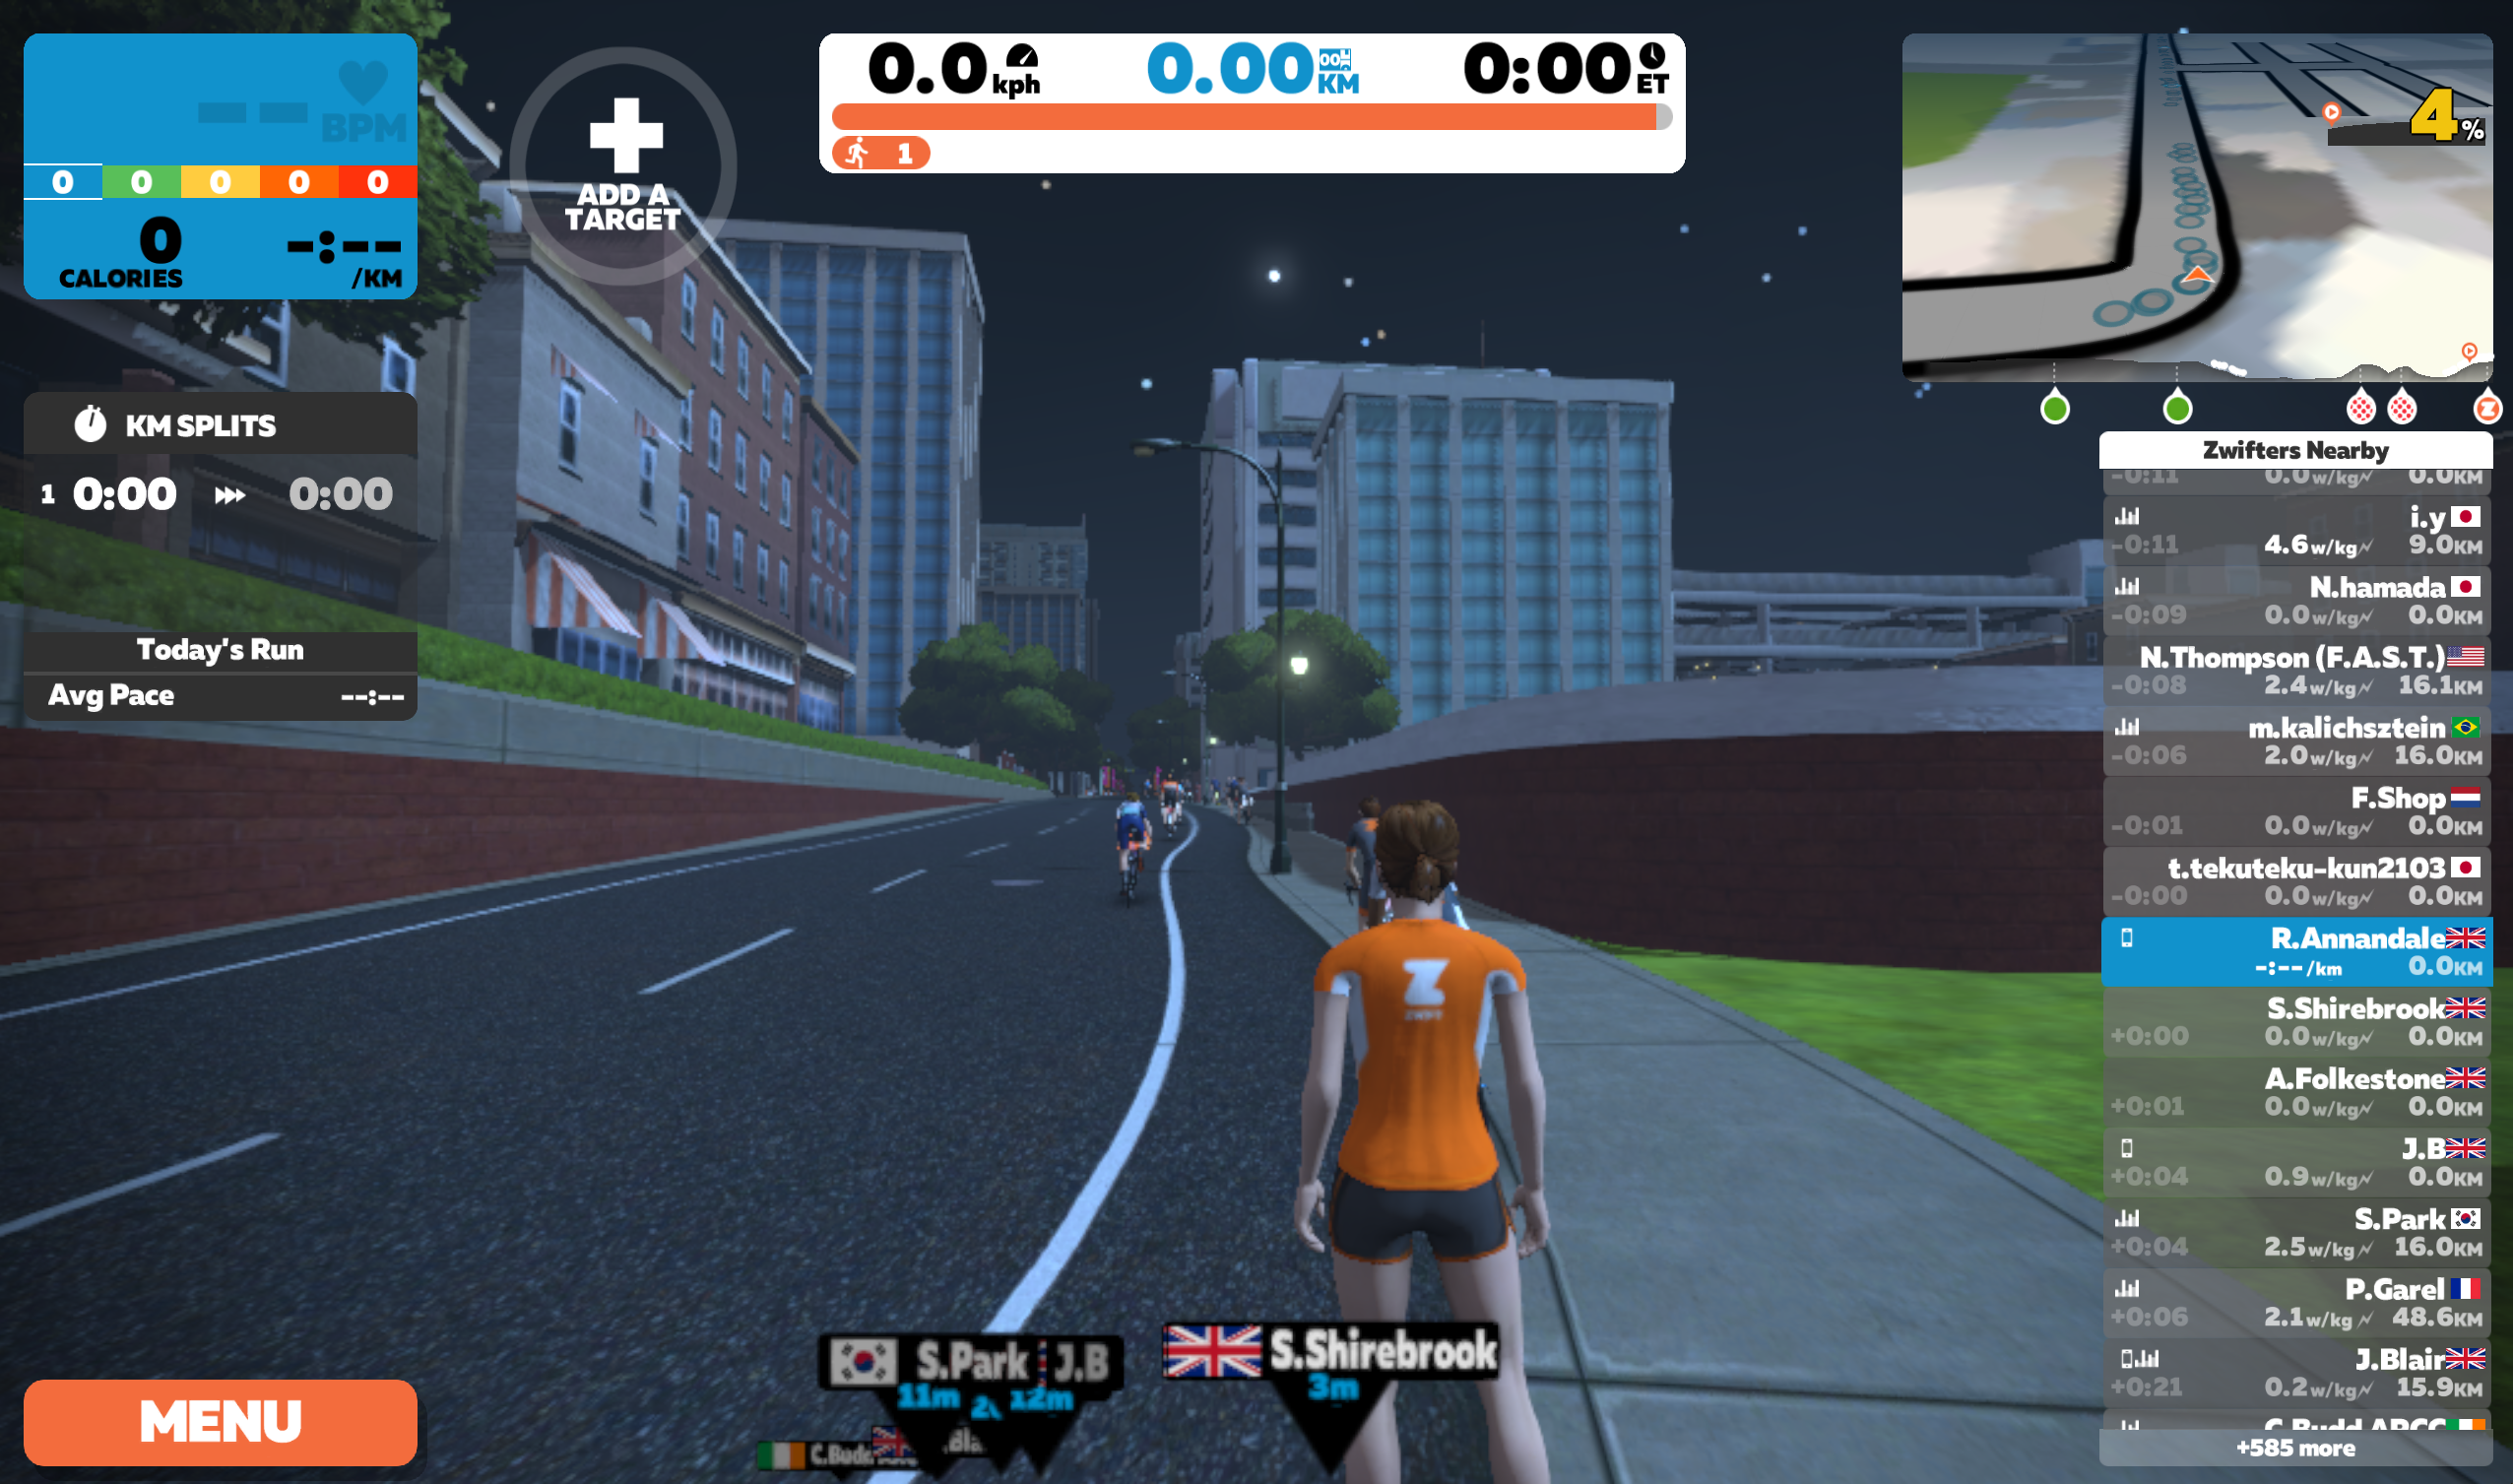
So then you’re ready to run. Before starting to run though I would suggest starting up a ‘Treadmill’ profile on your watch, I’ve set up a no GPS ‘cardio’ that will take the Footpod’s data and push it through my watch. This way you’ll get the same experience you’re used to from running outside, when running on the Treadmill. Take this time to also add additional features you your Zwift run by allowing your watch to broadcast your heart rate during the activity. This sounds a little weird but it will allow the ANT+ device to pick up your heart rate that’s being measured on your watch, instead of then buying a separate HR strap. To do this go to the activity profile menu scroll to Settings/Heart Rate Monitor then switch the toggle for Broadcast During Activity to Auto. This should then be picked up by the ANT+ receiver pretty instantly and will show your heart rate throughout the activity in the top left hand corner, including what zone you’re currently working in.
Other things you can do in Zwift: You can also do pre-written workouts, Zwift will let you know when to increase the pace etc., and will work within the pace zones that you’ve told it making every workout accessible to everyone, whatever the speed. You can also work towards a goal, that might be a weekly or monthly goal and can be added just before you set off on the run itself. From the same menu you can find what courses are open to be used on that day, as well as those in the future. The Watopia map (Zwift’s own curated world) is open every day but other courses are on rotation, these include; London, Richmond, New York, and Innsbrook. All having different route options available for you to use.
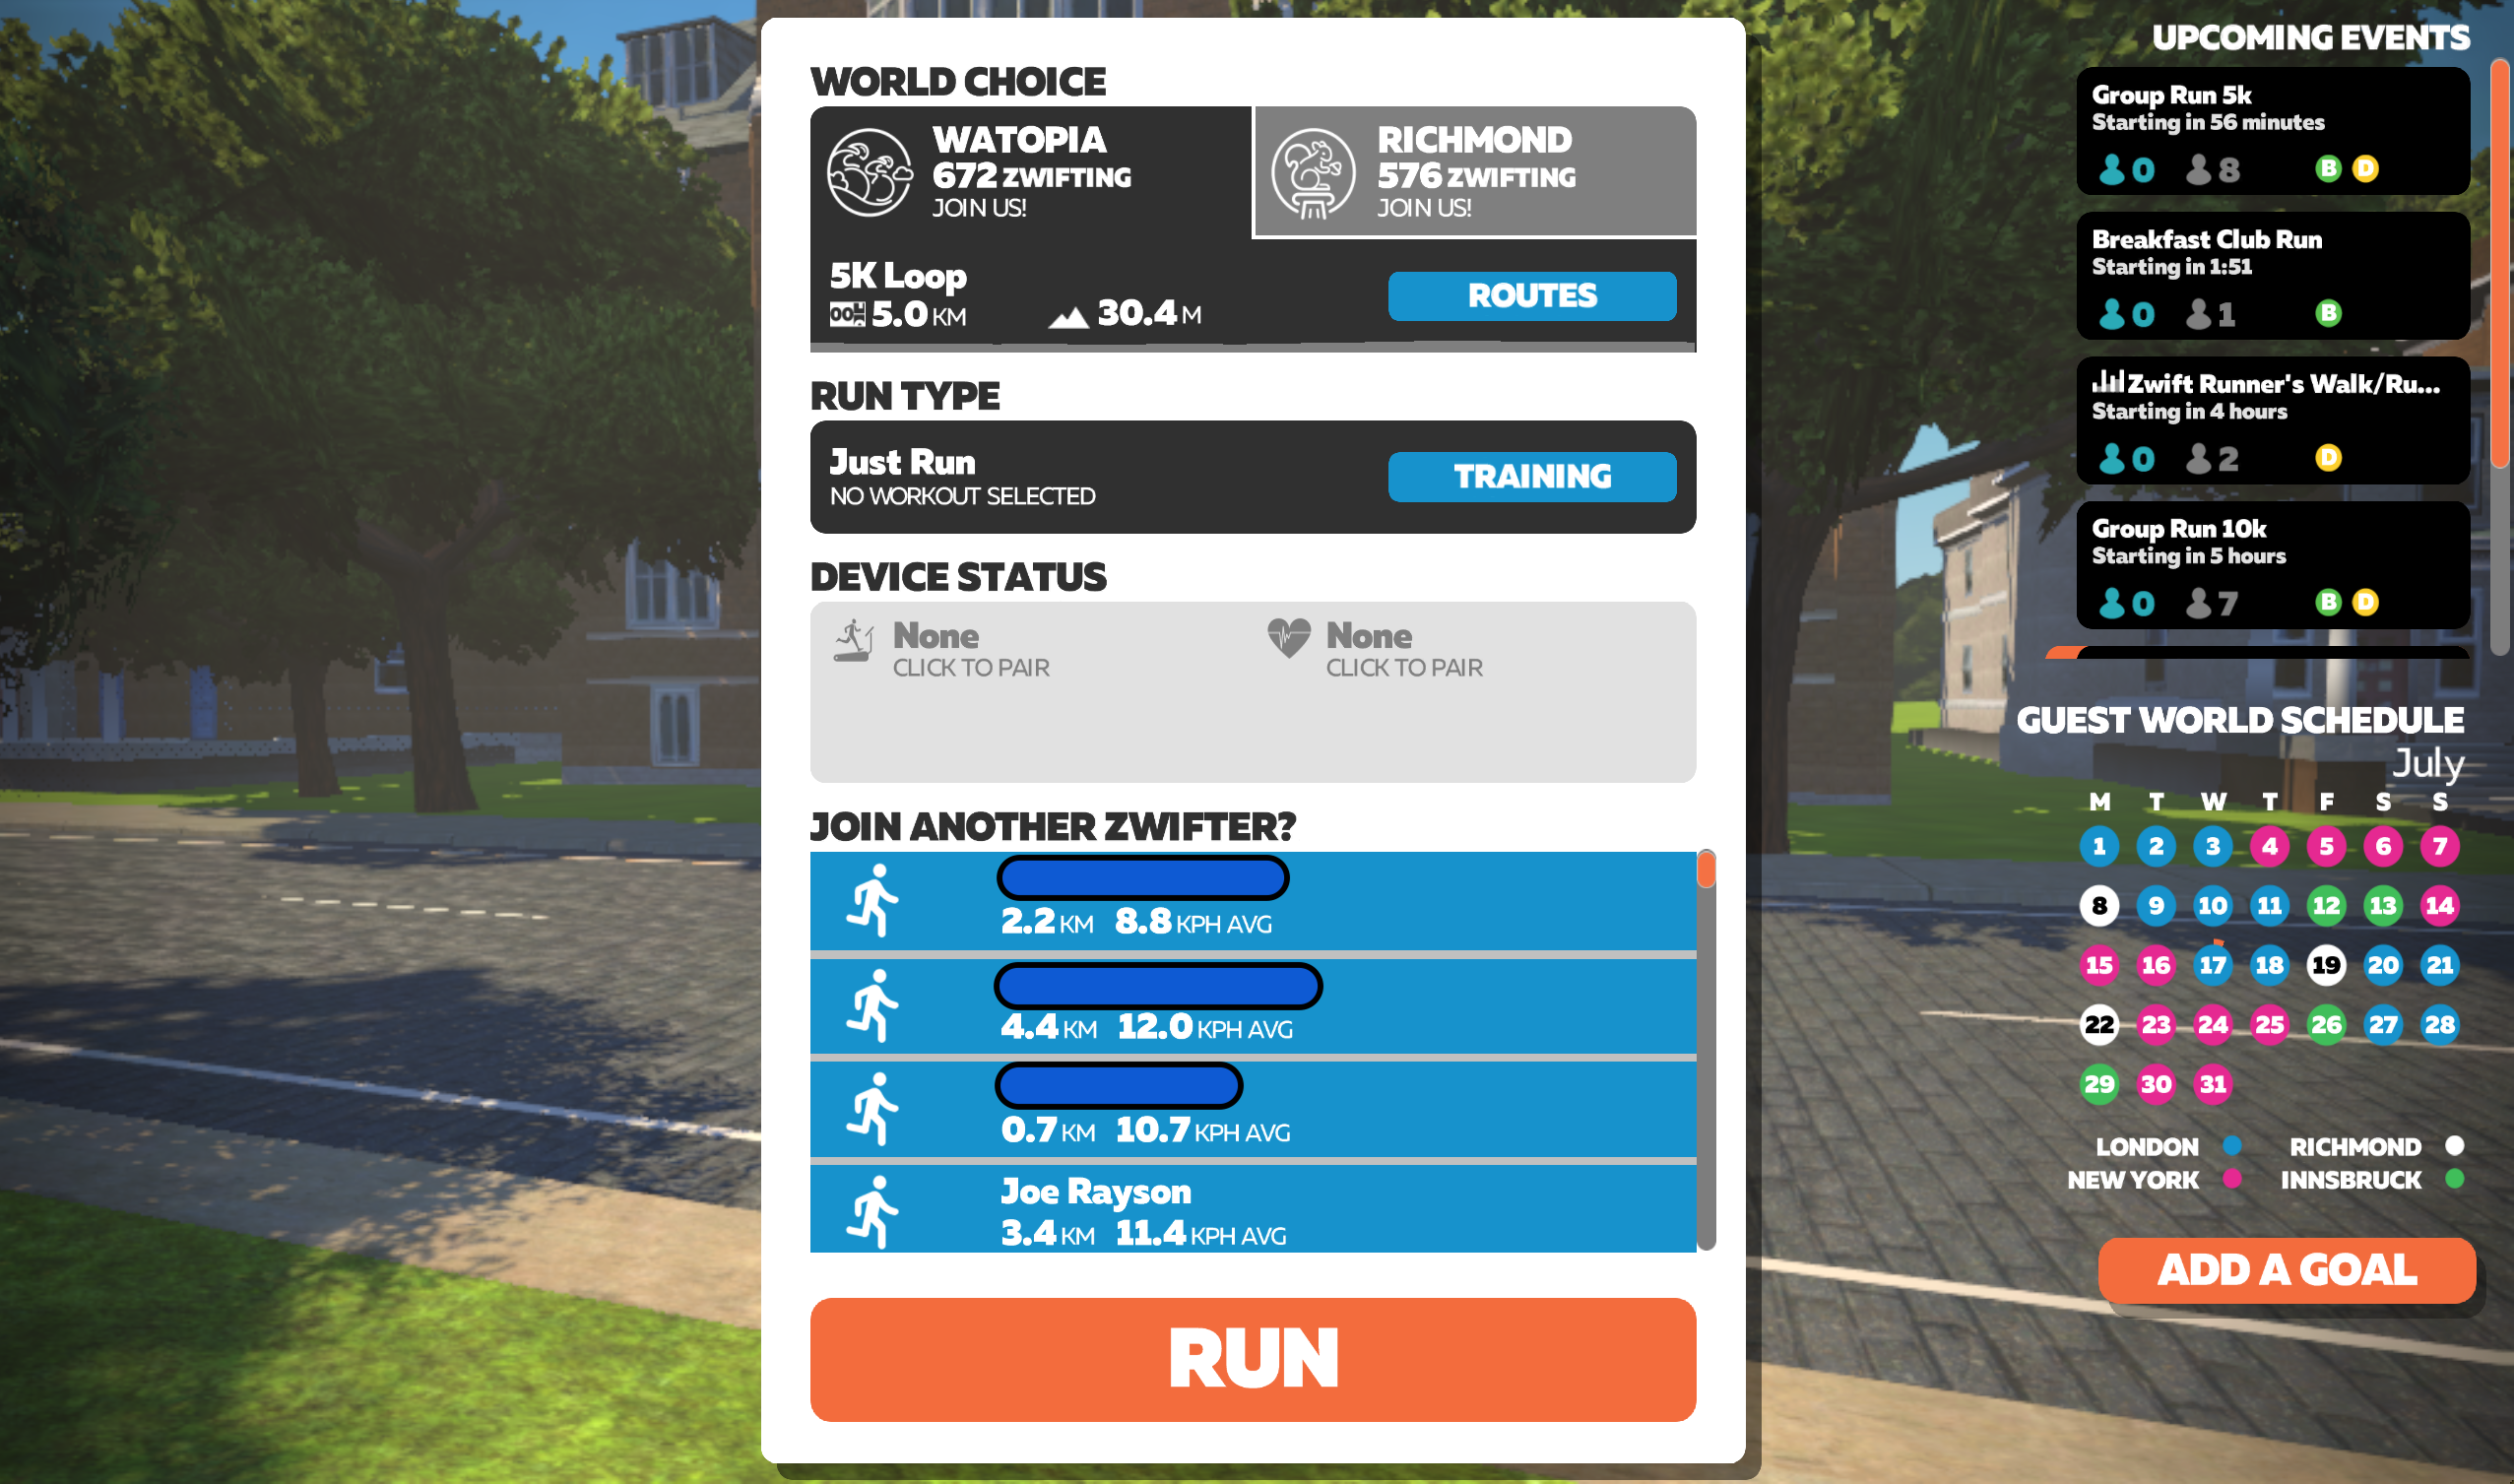
Swap between worlds using the buttons on the top and change the route using the routes button. There is also a mobile companion app should you wish to message and interact with the programme a little more as you run.
I hope this has helped a few of you get set up, I was struggling with the finding out exactly how to connect my Garmin device to the programme and wanted to share how I’ve done it to help anyone else struggling. Other devices that use bluetooth shouldn’t need the additional ANT+ receiver if your computer can use bluetooth.
Let me know how you get on and if this was useful at all! You can find me on the contact page, in the comments below, or through social media; @radancefitness on Facebook, Twitter and Instagram. Happy virtual running!
